 on the toolbar “Layout”. It can also be found in the main menu Tools.
Starting the Layout Wizard
You can start the Layout Wizard with the button Layout Wizard...  on the toolbar “Layout”. It can also be found in the main menu Tools.
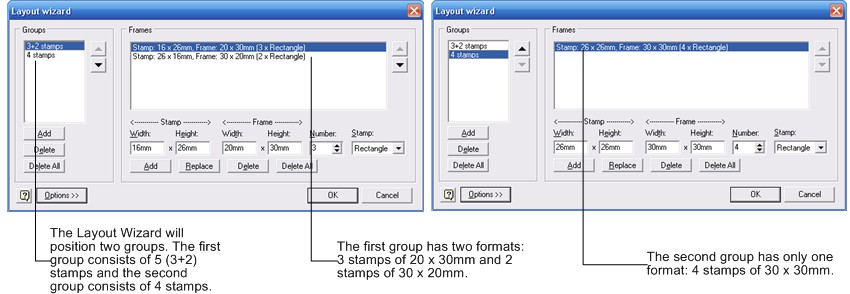
In the left part of the screen “Layout Wizard” you can maintain the groups you want to create and in the right part you can maintain the stamps per group. You can enter the number of stamps you want to create, their sizes and their shapes.
You can enter the size of the stamp as well as the size of the stamp frame. The size of the stamp frame is of course a little larger than the size of the stamp. If you enter the size of the stamp you will notice that the size of the stamp frame is calculated and filled in automatically. The amount of white space that will be added can be set by the setting "Scan and analyse - Distance between frame and perforation" on the tab page "Misc" on the screen "Settings".
Example: if you enter a stamp's size of 16 by 26 mm and the setting "Scan and analyse - Distance between frame and performation" has been set to 2 mm the size of the stamp frame will be: 20 (= 16 + 2 x 2) by 30 (= 26 + 2 x 2) mm.
By the way, it is not mandatory to enter the size of the stamp. Entering the size of the stamp frame gives the Layout Wizard enough information to draw the frames.
If your group consists of stamps of different sizes you add more lines in the right part of the screen with the button Add:

With the button Options >>> you can adjust the behaviour of the Layout Wizard.
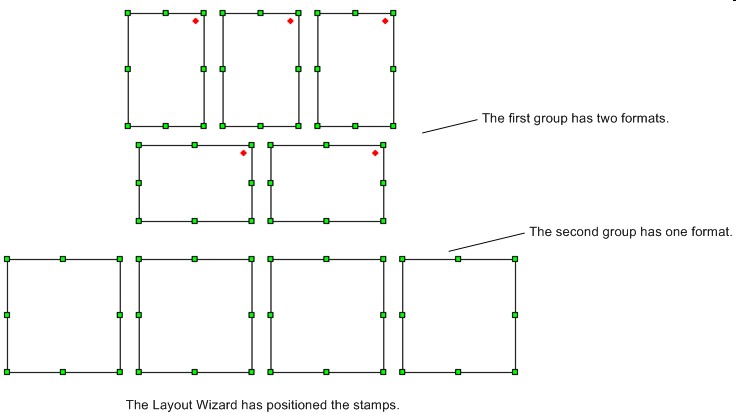
After pressing the OK button the Layout Wizard will automatically position and align the stamps on the page. Furthermore the groups will be created which is made visible by the red dots in the stamps upper right hand corners.

Copyright © 2007, Arvades